These are the steps you need to follow to set up your iPhone or iPad to check yo
ur email for iOS11:
Step 1. From the home screen, tap Settings.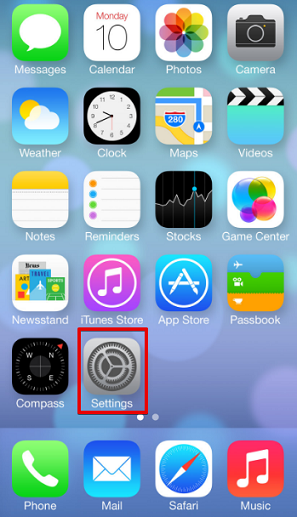
Step 2.Tap Accounts & Passwords.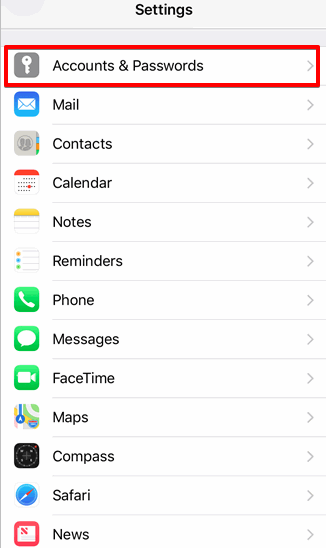
Step 3.Select Add Account.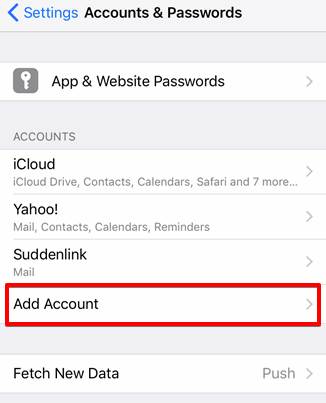
Step 4.Select Other.
Step 5.Select Add Mail Account.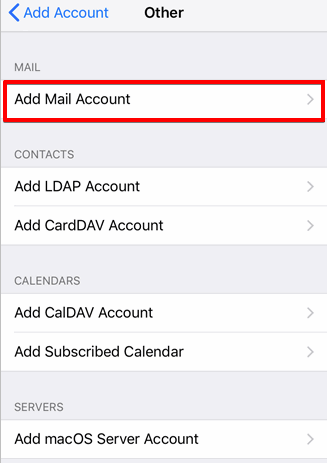
Step 6.Fill in the information on the New Account screen.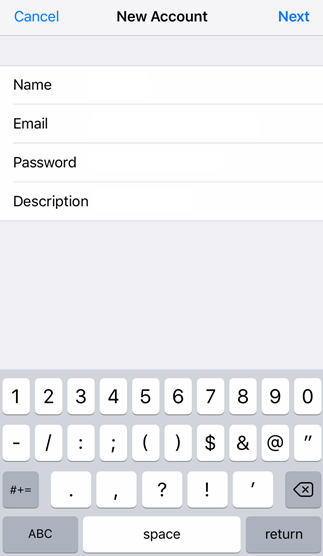
Below are descriptions for the fields:
Name: Enter the identifying name for your email address. In the example this is Bob, but it can be a functional name as well such as Your Business Sales.
Email: Enter the full email address.
Description: This is the name your mail will be shown as in your iPhone or iPad.
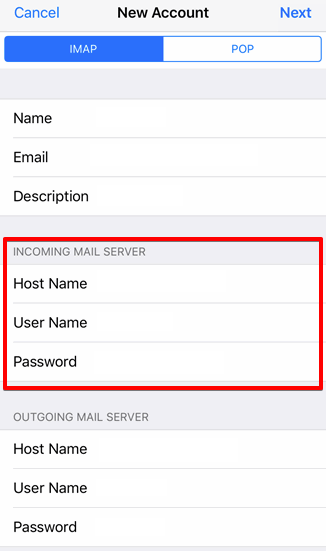
Step 7.Choose between IMAP or POP.
IMAP is the latest protocol used to retrieve messages from a server. By using this, you can access your full email history using any other devices.
POP, on the other hand, is an older model of communication. It downloads messages and deletes them from the server. What is great about this protocol is that you do not consume that much online disk space.
Step 8.Under the Incoming Mail Server section, enter the following information:
Host Name: mail.haniit.com.au
User Name Enter your full email address.
Password Enter the password you use for this email address.
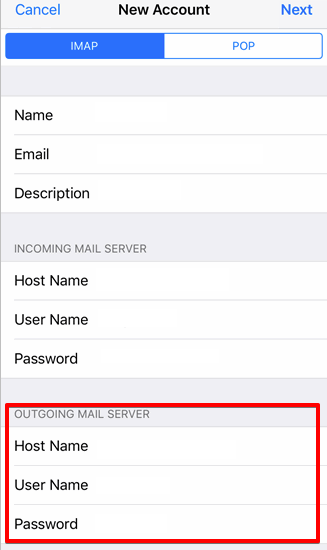
Step 9.Under the Outgoing Mail Server section, enter the following information:
Below are descriptions for the fields:
Host Name: mail.haniit.com.au
User Name Enter your full email address.
Password Enter the password you use for this email address.
Step 10.Tap Next in the top right corner.

By default, the iPhone or iPad will try to set up all connections with SSL enabled. If you do no use the correct SSL host name, you may receive an error.
If you see an error that says Cannot connect using SSL, select Yes.
Congratulations! You have added your email account to your iPhone or iPad for iOS11. Now, you should be able to use it to manage your email account.
