Setting up Galaxy S
These are the steps you need to follow to set up your Galaxy S phone to сheck your Email:
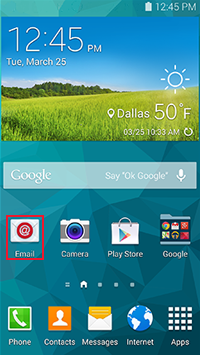
| Step 1. | On the front screen click the Email icon. If you cannot find it, select the Applications icon in the lower right corner and locate it. | ||||||||||||
 |
|||||||||||||
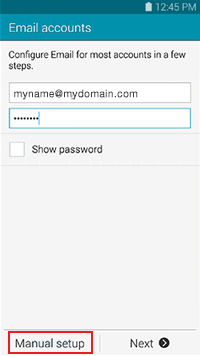
| Step 2. | If this is the first time you have set up an email you will see two fields. Enter your email address and password and then select Manual setup.
If you have an email already set up you will need to click on the top far right menu (the 3 dots) and select Settings then select Manage accounts and then click the + button. |
||||||||||||
 |
|||||||||||||
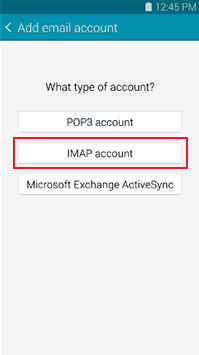
| Step 3. | Next screen will give you 3 options: POP3 Account, IMAP Account, or Microsoft Exchange ActiveSync.
Most people with a mobile device choose IMAP as it will be able to synchronise to other devices that check the email too. |
||||||||||||
 |
|||||||||||||
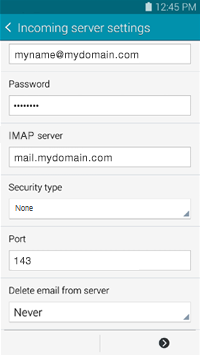
| Step 4. | On the next screen, you need to fill in various fields with your name, server and login information. | ||||||||||||
 |
|||||||||||||
| Below is a description of the fields: | |||||||||||||
| FOR IMAP | |||||||||||||
|
|||||||||||||
| FOR POP3 | |||||||||||||
|
|||||||||||||
| Step 5. | After completing the setup information select Next to continue. | ||||||||||||
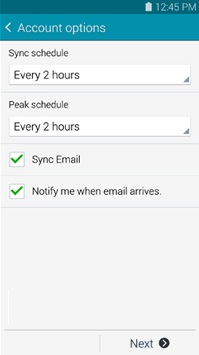
| Step 6. | In Account Options, choose these options: | ||||||||||||
 |
|||||||||||||
| Step 7. | Click Next. | ||||||||||||
| Step 8. | If you reach this point, it means all information you entered in the previous screens are all correct. | ||||||||||||
 |
|||||||||||||
| Here is the information you need to enter: | |||||||||||||
|
|||||||||||||
| Step 9. | Select Done. |
Congratulations, you have added your email account to your Samsung Galaxy phone. You should now be able to use it to manage your email account.
